The control panel buttons I went for are actually
illuminated. Each has a small 12V bulb inside. After getting the buttons
working and illuminated I decided they would look much better if they could be lit
in sequence like some sort of arcade fruit machine. So I set to work coming up
with something. After a few days tinkering I had a circuit built using an Atmel
AVR microcontroller using 16 logic level FETs to drive each of the bulbs. With
another button to switch patterns. The code was written in such a way the
additional patterns could be added with minimum fuss. There are only two
patterns, plus all on and all off at the moment but I do plan to add some more
later.
Saturday, 26 January 2013
My Weecade - Xbox Based Arcade Machine - Part 7
For the control panel I opted for the standard two player
layout. Six buttons per player plus the 1P/2P buttons. To interface the joysticks and buttons I
decided to use two old Xbox type S controllers. After stripping them down to
just the PCB and with help of this site slagcoin.com I soldered onto various points for each of the original Xbox buttons. This
meant I could just plug the controllers directly into the mother board
controller ports.
Friday, 25 January 2013


My Weecade - Xbox Based Arcade Machine - Part 5
So it’s been a few months since my last update but I am
pleased to announce I have finally finished it (well almost). It’s taken a while but I am extremely happy with the ways it’s turned
out.


Next time an update on the control panel.

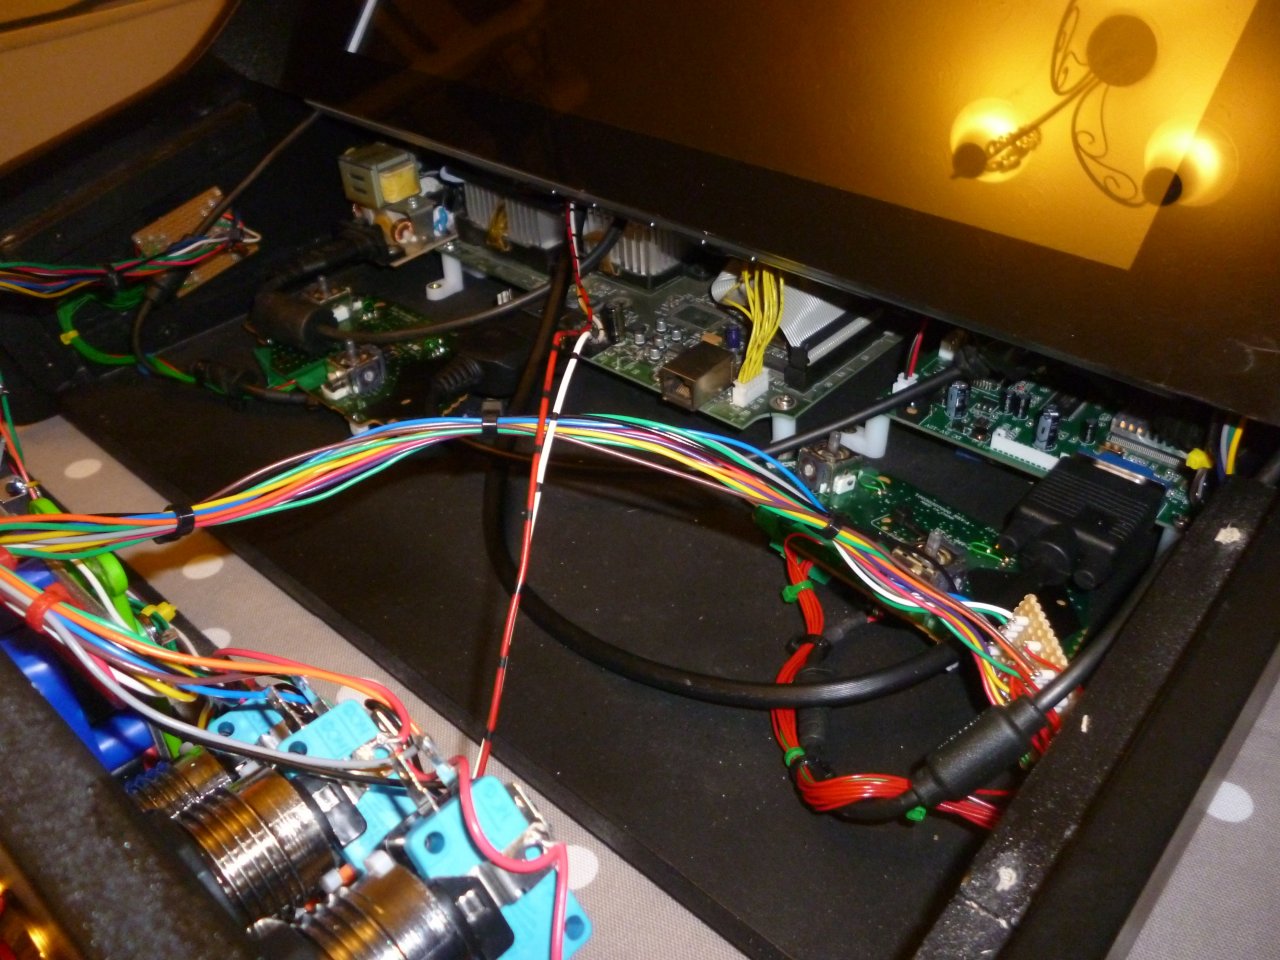
Since the last update I have stripped down my old Xbox and
mounted the parts in the new cabinet. Rather than mounting the entire DVD-ROM
drive I removed the PCB and just mounted that instead. As far as the Xbox is
concerned it’s a perfectly functioning drive so everything works fine. The hard drive is mounted on the
monitor support due to lack of space and the mains in is distributed via a junction box.

For the display I opted for a 17” monitor (flat screen
obviously there was no way a CRT was going to fit with everything else in
there). Some people prefer a 19”
screen but personally I think that is just slightly too big for a bar top
arcade cabinet like this. Converting the RGB video signal to VGA for the
monitor I purchased one of these CGA/EGA/YUV to VGA converters.

I know there are cheaper alternatives but I can honestly say this thing is worth every penny. It has a number of inputs including an RGBHV input which I am feeding from the Xbox’s scart. To ensure the best signal possible into the converter I built a sync stripper (based around the LM1881 Video Sync Separator chip from Texas Instruments). The sync stripper basically takes the composite video signal and extracts both the horizontal and vertical sync signals. This way I can feed the converter with clean dedicated component and sync signals. The converter then up scales the video to the native resolution of the monitor. I must say the results are awesome.

I know there are cheaper alternatives but I can honestly say this thing is worth every penny. It has a number of inputs including an RGBHV input which I am feeding from the Xbox’s scart. To ensure the best signal possible into the converter I built a sync stripper (based around the LM1881 Video Sync Separator chip from Texas Instruments). The sync stripper basically takes the composite video signal and extracts both the horizontal and vertical sync signals. This way I can feed the converter with clean dedicated component and sync signals. The converter then up scales the video to the native resolution of the monitor. I must say the results are awesome.
Next step sound. For this rather than stripping down a set of old mains powered PC speakers I decided to buy a dedicated amplifier instead. I was
toying with the idea of building my own amplifier based on a pair of TDA2003 10W car radio audio amplifier ICs but after pricing it up it worked out cheaper just to buy a
kit instead. So I did. It states it’s capable of
driving something like 18W per channel but that’s into a load of 4 ohms. The
speakers I have fitted are much higher impedance than that so the output power will be significantly
lower. This did concern me at first. But after powering it up for the first
time I needn't have worried. It is more than loud enough.

Sunday, 16 September 2012
My Weecade - Xbox Based Arcade Machine - Part 4
Right, another quick update. Had a rethink on the back panel for my weecade. Decided rather than having a solid back I would add some vents. Might even add a couple of 80mm fans while I am at it. Anyway cut a series of 3" holes as well as a cut out for the blanking plate for the power switch, volume control etc. The holes will be covered with wire mesh when that turns up.


Also added a sheet of 3mm clear acrylic to the top of the control panel. That should help protect the paint somewhat from those sweaty hands resting on it while playing. The joystick and button template has been added ready for drilling.


Also added a sheet of 3mm clear acrylic to the top of the control panel. That should help protect the paint somewhat from those sweaty hands resting on it while playing. The joystick and button template has been added ready for drilling.

Sunday, 2 September 2012


My Weecade - Xbox Based Arcade Machine - Part 2
Right got the ball rolling. After downloading the plans for the weecade from the link in degenatrons tutorial I created a template for the sides to make cutting the MDF easier. The remaining pieces I had cut to size by my local timber merchant. So I now have all of the wood cut, sanded an primed ready for assembly and painting.


Saturday, 1 September 2012
My Weecade - Xbox Based Arcade Machine - Part 1
After stumbling on this video of an Xbox based bartop arcade machine I decided this is something I had to have a go at building. I still have my old crystal Xbox in the loft gathering dust. The guy has a series of videos which shows the process of building one of these bad boys so it should be fairly straight forward right?
Subscribe to:
Posts (Atom)